Published by Henry Frankland – Latest update on 08/07/2021
ID: TN007
Relevant product(s): L-Edit
Operating systems: Linux RHEL 6 and above / Windows 7 and above
Versions affected: All
Relevant area(s): Usage / Technology
Summary
The layers’ colour rendering settings are fully customisable. Settings for texture/pattern and how layers get highlighted on selection within the layout can be changed. This enables the user to have control over the visibility of the layout and hierarchy if needed. This technote discusses how these options work in L-Edit.
Note: these changes may be done at the user’s own choice and responsibility. It is not recommended to change default foundry data.
Details
As this is a technology setting, please make sure it is applied to your technology reference (PDK tech) library, not the project. Otherwise settings may revert to original.
Note: these changes may be done at the user’s own choice and responsibility. It is not recommended to change default foundry data.
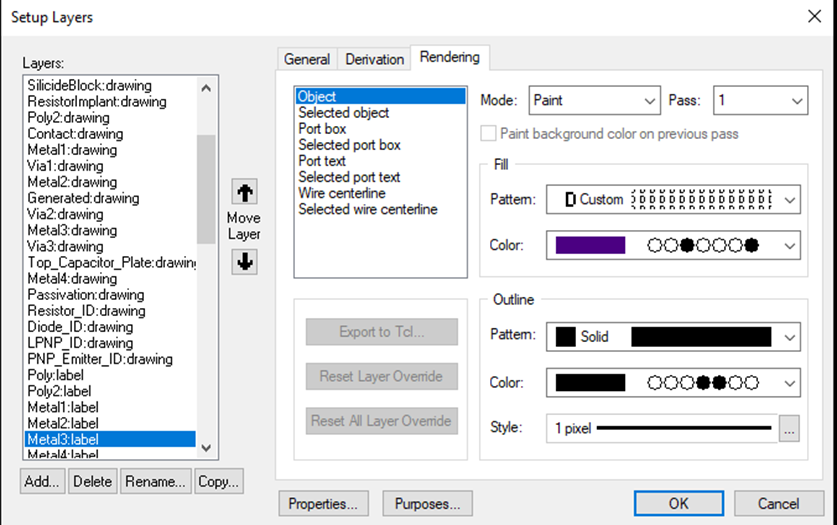
The rendering options of the layers can be accessed through the layer setup window shown below; access by going “Setup > Layers…”, but double-clicking on a layer from the palette, or by opening the layer palette and right clicking on the layer you want to adjust the rendering of and selecting “Setup Layers…” from the context menu.
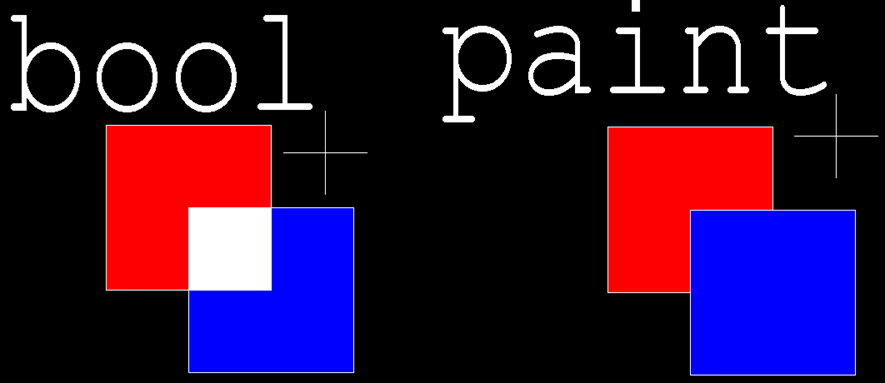
The layer colours in L-edit are tied to a 16/32/64/128/256 binary code. Depending on the mode selected for the layer when overlapping another they will add or subtract to create a new colour in the overlap region.
layers can combine in a logical way to produce new colours in the areas they overlap. Figure 2 left side is an example where red, blue and white have colour codes 1000, 0100 and 110 respectively. With additive the overlap will do a binary addition of 1000 + 0100 = 1100, resulting in the white colour. The right-hand side are different layers that don’t use any bit addition/subtraction to derive overlap colour.
Changing the colours
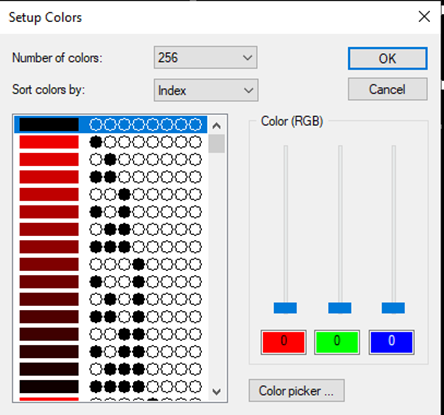
The colour rendering assigned to a particular colour code is fully customisable and is controlled by the colours menu. This menu can be accessed through “Setup > Colors…”. This menu will allow you to change how layers are coloured in the layout without the need to change the technology colour code assigned to a layer.